Thank you to Disney for giving me this amazing experience! All opinions expressed are 100% my own.

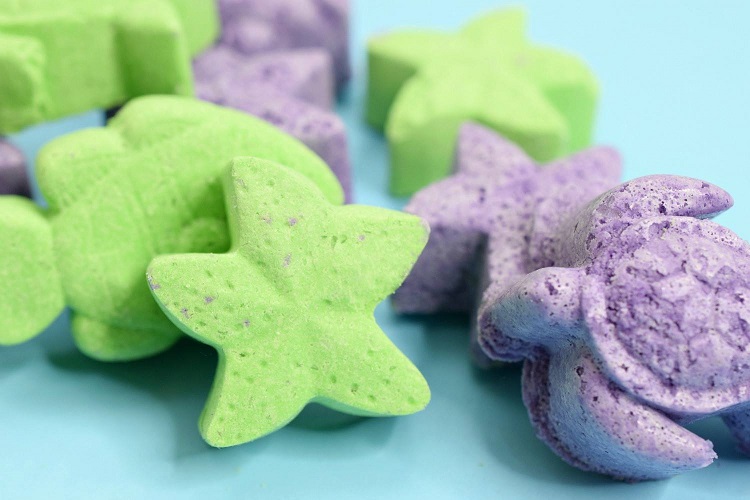
One of my favorite things to do when I have free time is relax in a nice hot bath. They come too few and far between nowadays, but when I do take a bath, I make the most of it. That is why I want to share this easy DIY bath bomb inspired by my favorite mermaid – Ariel! The Little Mermaid Anniversary Edition is coming to digital TODAY, February 12th, and Blu-ray/DVD on February 26th. Dive under the sea with these bath bombs and bring a smile to your face as you watch The Little Mermaid!
What You Need
- ocean themed molds – such as star fish, sea turtles, mermaid tails
- large bowl
- small bowl
- 2 Tablespoons Epsom salt
- 11 Tablespoons baking soda
- 5 Tablespoons cornstarch
- 5 Tablespoons of Citric Acid
- 2 teaspoons almond oil
- 6 teaspoons water
- scented oil
- food coloring (purple and green of course!)
- glitter (optional)
A HUGE thank you to Amy from As The Bunny Hops for this bath bomb recipe!
Directions
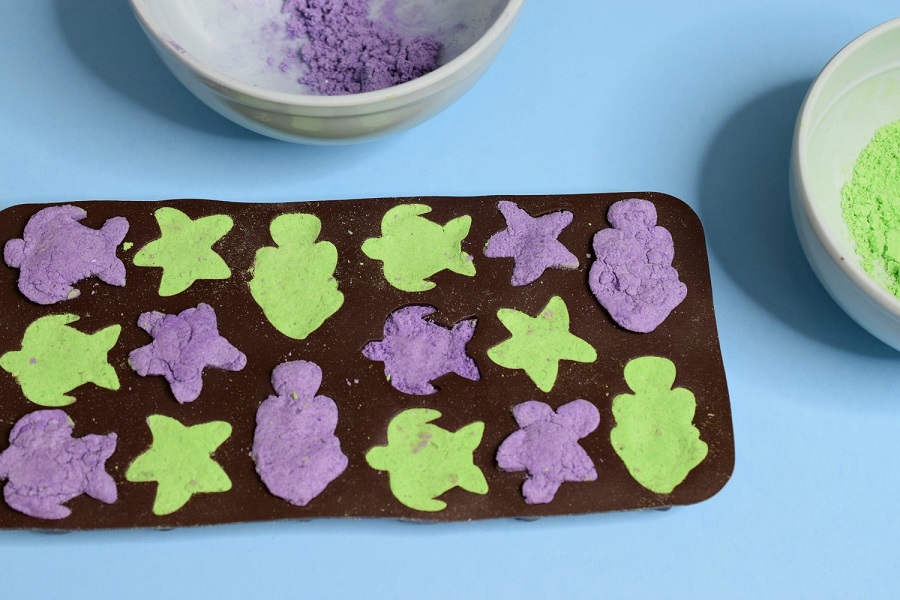
- Mix the baking soda, cornstarch, Epsom salt, and lemon juice together in the large bowl. If you are adding glitter, do so in this step.
- Whisk to ensure the mixture is free of clumps. If you want to make multi-colored bath bombs, separate the mixture in to small bowls here and color each one with 3 to 4 drops of food coloring.
- Mix coconut oil, water, and essential oil in the small bowl. Add 4 to 5 drops of food coloring if you are making all the same color.
- Slowly add the liquid mixture to the dry mixture, whisking as you go. I cannot stress enough how slowly this has to be added. You do not want any fizzing and foaming and you do not want an overly wet mixture. Trust me. I have had a few bad batches.
- Once mixture resembles clumpable sand, fill your silicone molds with it. Press down firmly to compact.
- Let them dry for 10 to 24 hours. Wait until they are completely dry before you try to take them out of the molds or you may break them.
- Use right away or wrap with saran wrap for safe storage.
Be sure to pin these directions so you can easily find them later!

Meeting Mark Henn (Again)
As you might have realized, Ariel has ALWAYS been one of my favorite princesses. So when I found out that I was going to have an art lesson from animation legend Mark Henn, who drew her, well, I was thrilled. After he taught us how to draw Vanellope (for the record – mine was much better than you might guess), we got a surprise as he drew Ariel for us. Disney even sent me a copy of the drawing that I plan to frame and hang up.

You can watch most of our chat and drawing class with Mark Henn below. We learned some pretty interesting things but honestly, my favorite part was just watching him work. It was very obvious this is something he has been doing for a long time – and it just comes naturally to him. We were in the presence of a legend guys. A LEGEND.
I interviewed Mark Henn back in 2015 for the release of the Walt Disney Animation Studios Short Films Collection. In that interview he told us that he was an Easter Egg in The Little Mermaid – one of those poor unfortunate souls that had a run in with Ursula. So when I saw him again, I asked him what his character had asked the sea witch for. Mark said he had never thought about that, but needed to come up with an origin story for his character. I hope to run in to him again so I can see if he came up with anything!

In this chat, he did let us know that the hardest part to draw on Ariel was her hair. I can totally see that since she is floating around in the water a lot. One of my favorite things about her is her hair, so I will say he got it right!

